Total Pageviews

Tuesday, October 27, 2015

••••DEVILISH DEVIL'S FOOD CUPCAKES••••

(Source: ambroisabaking.com & country living.com & photos also)


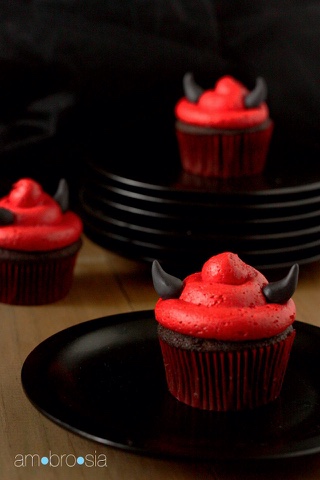
Devilish Devil's Food Cupcakes
cupcakes from Epicurious, frosting from The Hummingbird Bakery Cookbook

Ingredients

For the Cupcakes

1 cup boiling water
3/4 cup unsweetened cocoa powder
1/2 cup whole milk
1 teaspoon vanilla extract
2 cups all-purpose flour
1 1/4 teaspoons baking soda
1/2 teaspoon salt
1 cup (2 sticks) unsalted butter, at room temperature
1 1/4 cups dark brown sugar, packed
3/4 cup granulated sugar
4 large eggs, at room temperature

For the Frosting

4 cups confectioner's sugar
10 tablespoons unsalted butter, at room temperature
4 tablespoons whole milk
1-2 teaspoons vanilla extract (to taste)
red food coloring (I used Wilton gel colors)

fondant, tinted black (for decoration)

Directions

To make the cupcakes, begin by preheating the oven to 350 degrees F, and position a rack in the middle of the oven.  Line cupcake tins with paper liners. 

In a bowl, whisk together the boiling water and cocoa powder until smooth.  Whisk in the milk and vanilla extract.  In a separate bowl, sift together the flour, baking soda, and salt. 

In the bowl of a standard electric mixer, fitted with the paddle attachment, beat together the butter and both sugars until light and fluffy.  Beat in the eggs one at a time, beating well after each addition.  Begin to add in the flour mixture and the cocoa mixture to the creamed butter, alternating between the dry and wet ingredients, and making sure to begin and end with the flour mixture.  The batter may look slightly curdled, but don't worry, this is what you want!  Mix together only until just combined.

Divide the cake batter evenly among the cupcake tins.  Bake the cupcakes in the oven until  a tooth pick inserted into the center of the cupcakes comes out clean, about 20-25 minutes.  Set the cupcake tins on wire racks, and allow the cupcakes to cool in the tins for about five minutes, before removing them and allowing them to cool completely on the racks. 

While the cupcakes are cooling, prepare the frosting.  In the bowl of a standard electric mixer fitted with the paddle attachment, beat together the confectioner's sugar and butter until the mixture begins to come together. Lower the mixer speed, and add in the milk and vanilla extract.  Increase the mixer speed to high, and beat the frosting until it is light and fluffy, about 5 minutes.  Add enough food coloring to turn the frosting a bright shade of red.  Once the cupcakes have cooled completely, frost the cupcakes with a large round tip (I used an Ateco 807 plain tip).  Take the black fondant, and begin to shape small bits of it into curved devil horns, and then place the horns on top of the cupcakes.  Enjoy!

Makes 24 cupcakes. 


••••FOOD TIP••••

(Source: google+)

••••HALLOWEEN BROWNIE GRAVEYARD••••

(Source: culinary ginger.com & yummily.com & photos also)


Halloween brownie graveyard
 
 
Prep time
Cook time
Total time
 
Recipe type: Dessert
Serves: 6-8
Ingredients
  • For the brownie:
  • 16 ounces Chocoley V125 indulgence bittersweet dark chocolate
  • 2 cups all-purpose flour
  • 1 teaspoon baking powder
  • 2 teaspoons vanilla extract
  • For the tombstones:
  • 1 cup confectioners sugar
  • 4 teaspoons milk
  • Black food coloring
  • 3 oval shape cookies
  • Chocoley drizzle and design chocolate, dark
  • For the skeletons:
  • Chocoley drizzle and design chocolate, white
  • Skeleton bones candy mold
  • To assemble:
  • 1-16 ounce tub store-bought vanilla frosting
  • Green food coloring
Instructions
  1. For the brownie:
  2. Preheat oven to 325 degrees F.
  3. Grease a 9 x 13 baking dish and line with parchment paper.
  4. Using a double boiler, or heatproof bowl over saucepan of water, heat butter and 6 ounces of the chocolate over low heat until melted, stirring gently. Turn of heat when melted, but keep bowl over saucepan to keep mixture warm.
  5. Mix the sugar into the butter and chocolate.
  6. In a separate mixing bowl, lightly beat the eggs and vanilla together.
  7. Add the eggs to the chocolate mixture and stir until fully mixed.
  8. Add the flour and baking powder to the chocolate mixture and mix until completely uniform.
  9. Chop the remaining 2 ounces of dark chocolate and mix into the batter.
  10. Pour the batter into the prepared pan and spread evenly with a spatula.
  11. Bake for 1 hour or until a toothpick comes out clean when inserted.
  12. Allow to cool completely in the pan, then remove using parchment paper to lift out.
  13. For the tombstones:
  14. In a bowl, mix the confectioners sugar with the milk until smooth.
  15. Add black food coloring (I used a toothpick to add a very small amount), in small amounts until the grey color is achieved.
  16. Smooth over the cookies and allow to dry on a cooling rack.
  17. For the skeletons:
  18. Melt the chocolate drizzle per package instructions and drizzle into the mold.
  19. Refrigerate until hardened then remove from mold.
  20. To assemble:
  21. Place brownie on a cutting board.
  22. Cut 3, 2¼ inch x 5 inch graves' in the brownie evenly spaced.
  23. Using a fork, rake out the brownie so it crumbles like soil, put into a bowl.
  24. Mound the 'soil' back into the 'graves'.
  25. Arrange skeleton parts in and around the 'graves'.
  26. Using a sharp knife, cut a small area of brownie out at the head of the graves and insert cookies into the brownie.
  27. In a mixing bowl, add the frosting and a few drops of green food coloring to achieve the desired color.
  28. Add to a piping bag using piping tip 233 and pipe 'grass' around the graves.

••••HALLOWEEN SPIDER COOKIES••••

(Source: everyday dishes.com & yummily.com & photos also)


Halloween Spider Cookies

prep time
 
cook time
 
total time
 
makes
16 cookies
 

what you'll need
cookies
  • 6 Tbsp unsalted butter, softened
  • ½ cup creamy peanut butter
  • ¼ cup granulated sugar, plus more for coating
  • ¼ cup light brown sugar
  • 1 large egg, room temperature
  • ½ tsp pure vanilla extract
  • 1 cup all-purpose flour
  • ½ tsp baking soda
  • ¼ tsp salt
decoration
  • 16 malted milk balls
  • 16 chocolate-covered peanuts or raisins
  • 1 tube chocolate cookie icing
  • 1 tube red gel icing
let's do it
  1. Place a rack in center of oven then preheat to 350 degrees. Meanwhile, line a baking sheet with parchment paper then set aside.
  2. Blend butter and peanut butter in large bowl or the bowl of a stand mixer fitted with the paddle attachment until completely combined. Add granulated sugar and brown sugar then beat until fluffy. Scrape down the sides of the bowl, add egg and vanilla then mix until well combined.
  3. Sift flour, baking soda and salt over the peanut butter mixture then mix until just combined. Scoop dough into 1" balls using a medium cookie scoop and roll in granulated sugar. Place on prepared baking sheet. All 16 should fit on one baking sheet, as they do not spread out too much. Bake 8-10 minutes or until light brown around the edges.
  4. Remove from oven then press a malted milk ball into the center of each cookie. Place a chocolate-covered peanut (or raisin) right next to the malted milk ball to form the body of the spider then let the cookies cool completely on a wire rack.
  5. Use chocolate icing to pipe the spiders’ legs and a touch of red icing on the back to complete the look of a black widow spider. Enjoy these spooky treats!

••••HALLOWEEN CANDY BARK••••

(Source: foodlovinfamily.com & yummily.com & photos also)

••••LOOKS YUMMY!!!


HALLOWEEN CANDY BARK
Prep time:  
Cook time:  
Total time:  
Serves: 8
 
INGREDIENTS
  • 1 package almond bark, white chocolate, or candy melts
  • pretzel sticks
  • chocolate sandwich cookies
  • assorted sprinkles
  • candy corn
INSTRUCTIONS
  1. Line a baking sheet with parchment paper, silicone mat, or wax paper.
  2. Chop cookies, pretzels, set aside.
  3. Melt the chocolate as directed on package. I melted mine with a double boiler.
  4. Pour the chocolate on the baking sheet and spread out about ¼ inch thick.
  5. Sprinkle candy corn, cookies, pretzels, sprinkles on top of chocolate.
  6. Push down the cookies, pretzels, candy to make sure in the chocolate.
  7. Let candy harden or you can put in refrigerator for 10 minutes to harden faster.
  8. Once candy is completely harden break into pieces.
  9. Can store in airtight container for up to 1 week.

•••JACK-O-LANTERN FOLDIT PIZZA••••

(Source: flatoutbread.com & photos also & yummily.com)

••••JACK-O-LANTERN FOLDIT PIZZA••••

1 Flatout Foldit® Artisan Flatbread, cut into two rounds

¼ cup pizza sauce

1/3 cup Cheddar cheese, shredded

Pieces of favorite vegetables (cucumbers, red peppers, olives, etc.) to make face and stem

Olive oil cooking spray

Preheat oven to 350 degrees F. Spray cookie sheet with cooking spray and place rounds on sheet. Bake for 4 minutes or until lightly golden. Remove, cool slightly.

Spread each round with pizza sauce and top with shredded cheese. Return to oven and bake for 4 minutes or until cheese melts. Remove from oven and arrange vegetables to create the face. Try red pepper strips for the mouth, cauliflower or broccoli for the nose, broccoli or cherry tomatoes for the eyes. Place an upside-down cucumber end or broccoli stem at the top middle to create a pumpkin stem.

Monday, October 26, 2015

••••GRAVE DIGGER COCKTAIL••••

(Source: boulderlacovorde.com & country living.com & photos also)


The Grave Digger Cocktail

Yield: 1 cocktail

The Grave Digger cocktail is perfect not only for Halloween but as a celebration of fall. Flavors of apple and ginger make this a great seasonal sipper.

Ingredients

  • 2 ounces Hard Cider
  • 1 ounce Whiskey (I used Bourbon)
  • Ginger ale, to fill
  • Crushed ice

Instructions

  1. In a 12-16 ounce tumbler or high ball glass, combine the hard cider and whiskey. Fill the glass with crushed ice. Fill with ginger ale.