••TRADITIONAL
••••MOONCAKE••(CHINA 🇨🇳!!

••••HERE’S THE VIDEO!!
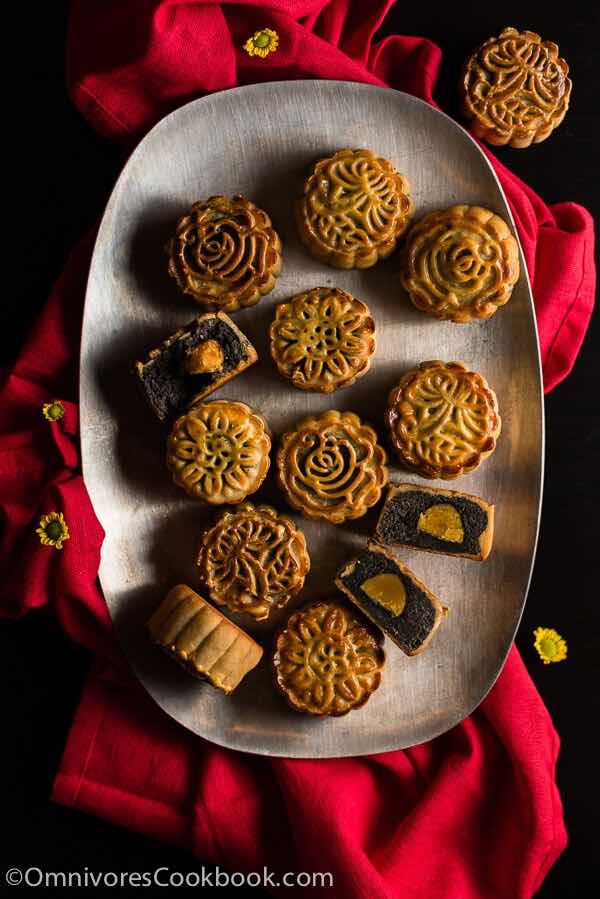
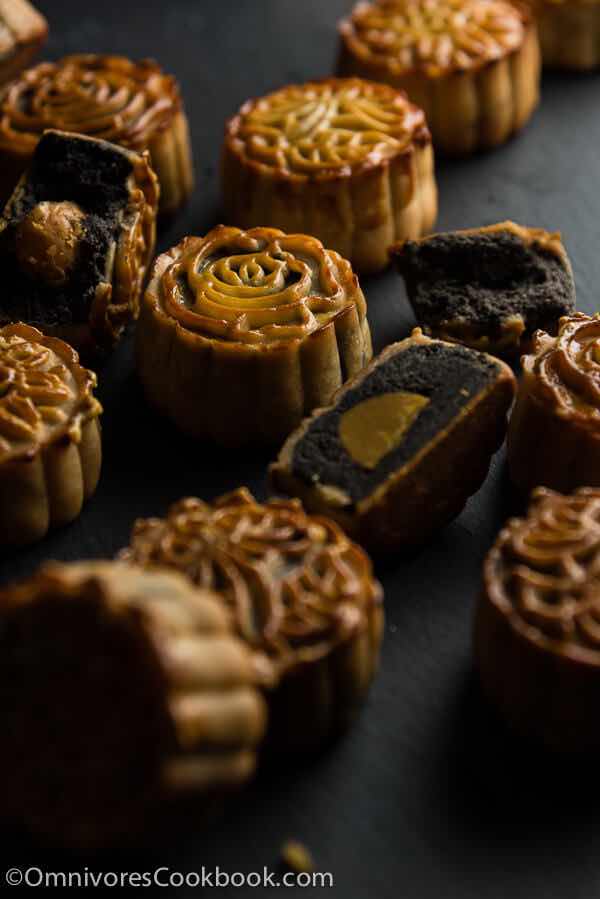
A moon cake (simplified Chinese:月饼; traditional Chinese月餅) is a Chinese bakery product traditionally eaten during the Mid-Autumn Festival (中秋節). The festival is about lunar appreciation and Moon watching, and mooncakes are regarded as an indispensable delicacy. Mooncakes are offered between friends or on family gatherings while celebrating the festival. The Mid-Autumn Festival is one of the four most important Chinese festivals.

🇨🇳🇨🇳🇨🇳🇨🇳🇨🇳🇨🇳🇨🇳🇨🇳🇨🇳🇨🇳🇨🇳🇨🇳🇨🇳🇨🇳🇨🇳🇨🇳🇨🇳🇨🇳🇨🇳🇨🇳🇨🇳🇨🇳🇨🇳🇨🇳🇨🇳🇨🇳🇨🇳🇨🇳🇨🇳🇨🇳🇨🇳🇨🇳🇨🇳🇨🇳
••••HERE’S THE VIDEO!!!

••TRADITIONAL
•••••MOONCAKE🇨🇳!!
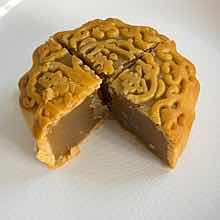
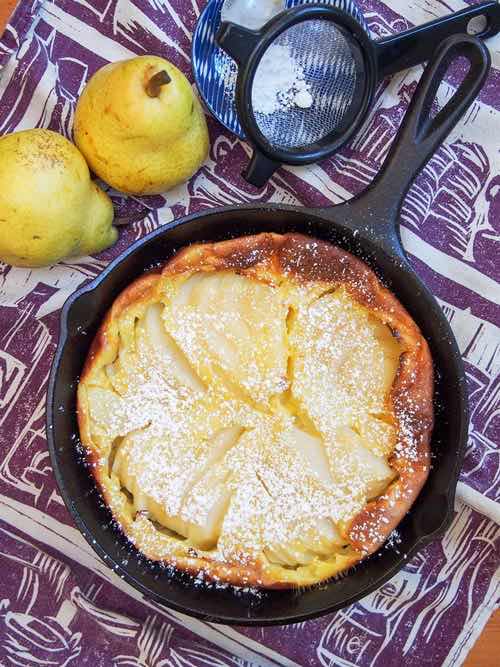
This recipe shows you how to create traditional Cantonese mooncakes from scratch without purchasing golden syrup or kansui. In this recipe, you get a delicious black sesame filling, a dough that has a good mouthfeel and keeps its shape, and thorough step-by-step pictures of the whole process.
Servings: 10 mini mooncakes
Ingredients
Mooncake filling
- 1 cup (140 grams) raw black sesame seeds
- 1/3 cup (45 grams) confectioners sugar
- 1/4 cup (55 grams) unsalted butter
- 1/4 cup (40 grams) glutinous rice flour
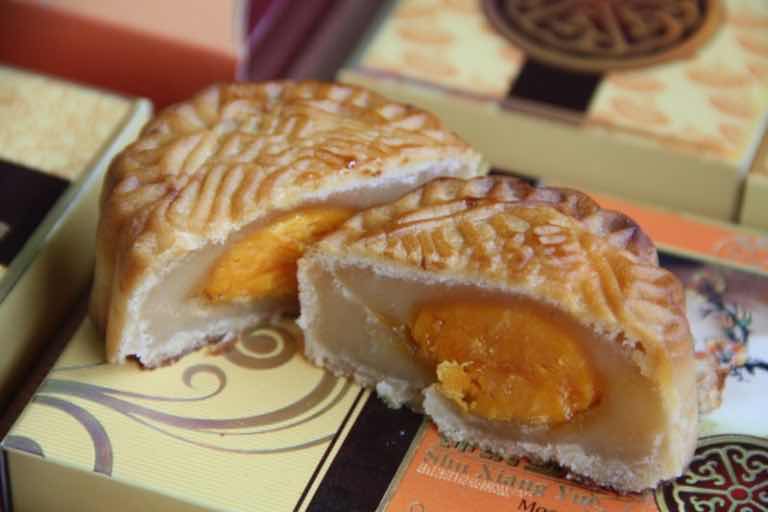
- 5 salty duck egg yolks about 14 grams per yolk, halved (*footnote 1)
Mooncake dough
- 56 grams homemade golden syrup (or store-bought)
- 1/2 teaspoon homemade kansui (or store-bought)
- 20 grams peanut oil (or vegetable oil that doesn’t have a strong flavor)
- 1/8 teaspoon salt and a pinch for the egg wash
- 100 grams cake flour and extra to dust the mooncake dough
- 1 large egg yolk (or a whole egg) (*see footnote 2)
Instructions
To make mooncake filling
- Spread black sesame seeds in a large skillet and turn to medium heat. When the skillet gets hot, turn to medium low heat. Stir every 3 to 4 minutes. Cook until you smell a very strong nutty aroma and hear the sesame seeds sizzling. Transfer to a plate to cool.
- When the black sesame seeds cool off, transfer to a food processor. Blend until the sesame seeds start to seep oil and thicken, about 2 minutes. Use a spatula to thoroughly scrape the paste from the the walls and bottom of the food processor. Blend again until it forms a fine paste, about 1 minute. Scrape the paste from the walls and bottom.
- Add confectioners sugar and butter. Blend again until everything is fully mixed. Transfer to a bowl.
- Add glutinous rice flour. Fold with spatula until the flour is fully blended and the paste forms a dough. If the dough can’t be lifted by hand and is still a bit runny, blend in more rice flour.
- Divide the sesame paste into 10 parts, about 1.5 tablespoons (20 to 30 grams) per portion. Shape each portion into a small ball.
- To shape the mooncake filling, flatten one black sesame ball with the hands. Place half a duck egg yolk in the middle. Wrap the sesame paste until it fully covers the egg yolk. Roll with hands to shape a ball. If you hold the filling ball up to a mooncake mold, the ball should be slightly smaller than the opening of the mold.
- Place mooncake filling in the fridge to cool. Wait until the balls harden.
To make mooncake dough
- Combine golden syrup and kansui in a large bowl. Mix with a spatula until emulsified (*footnote 3).
- Add peanut oil (or vegetable oil) and mix again until evenly blended. They will still appear separated, but try to mix as evenly as possible.
- Sift cake flour into the bowl. Gently fold the dough with a motion of scraping from bottom to top, like you are folding a cake dough. Do not stir the dough in a circular motion. It will toughen the dough.
- When the flour is fully combined, shape the dough into a ball. The dough should be soft and a bit sticky but still hold its shape. Slowly add more flour if the dough is too difficult to handle. Gently knead the dough a few times with hands (*footnote 4), with a folding motion. Seal with plastic wrap. Let rest for 30 minutes.
- Gently knead the dough a few more times and place it back in the plastic wrap. Let rest for another 20 to 30 minutes. Then the dough will be ready to use (*footnote 5).
To assemble mooncakes
- Work on the mooncakes one at a time. Scoop 2 teaspoons dough (I love to use a medium-sized cookie scoop for this) and place between two pieces of parchment. Press it into a flat disc. Roll into a small round sheet. If possible, make the middle of the sheet thinner than the edges.
- Place the black sesame ball in the center of the dough sheet. Carefully wrap the dough around the filling. Spread the dough until it seals the filling in completely. Try to wrap the filling in a thin, even layer of dough. If you find the dough on some spots is too thick, pull off the dough and smooth the surface. It is doesn’t matter if the dough is so thin that it reveals the color of the filling.
- Dust both hands and the dough with a bit of cake flour. Roll the dough betweens hands so the surface will be dusted evenly.
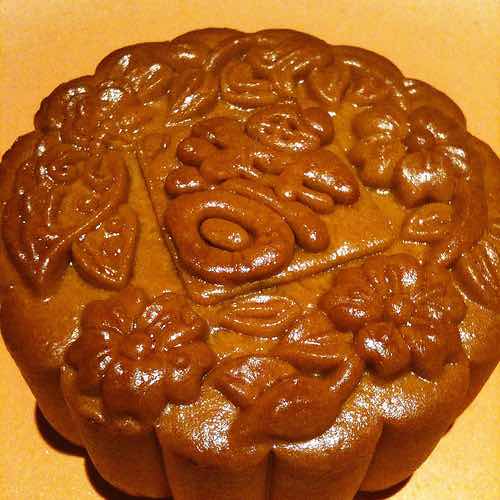
- Slide the plastic pattern disc into the mooncake mold, pattern side down. Sometimes you need to twist the handle a bit to make the pattern disc slide to the end.
- Carefully place the mooncake into the mold. If you find it difficult to do without scraping off dough, you can gently roll the mooncake to fit into the mold.
- Place the mold on the parchment and press the handle until you cannot move it any further. Pull the handle up and release the mooncake.
- Carefully hold the mooncake without squeezing it, and remove the pattern disc.
- If you find the process too difficult and cannot shape a clear pattern,wrap all the mooncakes first and shape them into balls. Place the mooncake balls onto a large baking tray and seal it with plastic wrap. Place in fridge for 10 to 20 minutes until the dough hardens a bit (do not chill the dough for too long).
To cook mooncakes
- Preheat oven to 360 degrees F (180 C).
- Place mooncakes on a big metal baking tray, 1 inch (2cm) apart. Spray a thin layer of water onto the mooncakes to prevent the dough from cracking.
- Beat the egg yolk with a pinch of salt in a small bowl.
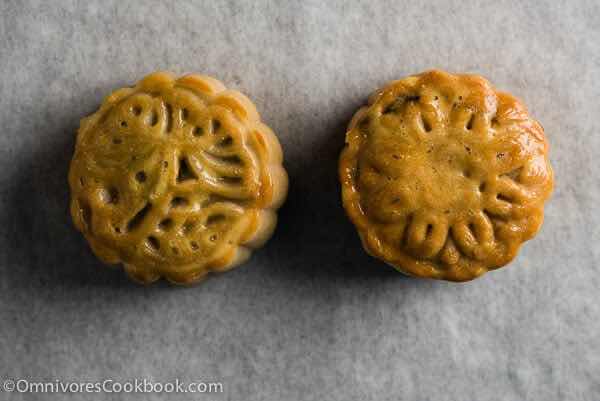
- Bake on the middle rack for 8 to 9 minutes, until the dough toughens and the edges of the mooncakes start to turn golden.
- Remove the mooncakes from the oven. Brush a thin layer of egg wash on the surface of the mooncakes. Only brush the top surfaces, not the vertical surfaces. If you accidentally brush too much egg wash and it fills up the pattern, use a small brush to clean the gaps and remove excess egg wash.
- Place mooncakes back in the oven and continue baking until the egg wash turns golden brown, about 8 minutes.
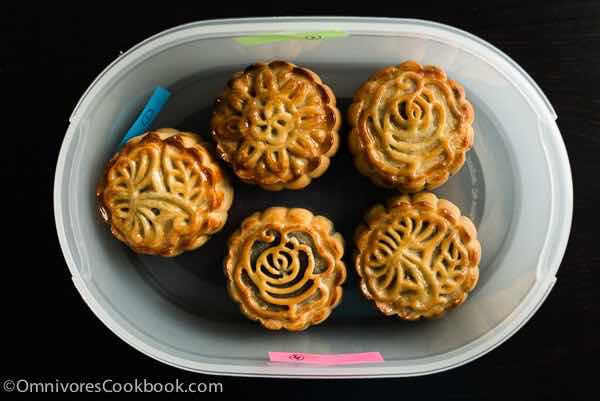
- Let mooncakes cool in the tray before removing (*footnote 6). Use a spatula to gently push mooncakes to detach them from the baking tray. Transfer to a plate to cool completely.
- Store mooncakes in an airtight container. The mooncakes can be served after 24 hours, and they will look and taste better after 3 days.

Notes
- To make black sesame mooncakes without egg yolk, double the black sesame filling and you will be able to make 10 mini mooncakes.
- I found using egg yolk with salt yields prettier mooncakes with a nice aroma. However, egg yolk is quite thick and might be a bit difficult to brush. You can use a whole egg alternatively or slowly add egg white into the beaten egg yolk to dilute it.
- If you’re using store-bought golden syrup, you might not able to get the emulsified mixture due to the lower acid ratio. You can read more about the details in this post.
- Do not knead the dough on a wooden board or working surface. It will stick the surface.
- If the black sesame filling hasn’t toughened, keep the dough in the plastic wrap until you’re ready to assemble the mooncakes. It’s OK to let the dough rest for another hour or two on the countertop. But if you leave the dough there for too long (half a day or overnight), it will become tough.
- The mooncakes will be flaky and soft when hot. If you remove them right after baking, you will crush the cakes easily.
- ••••HERE’S THE VIDEO!!


••••HERE’S THE VIDEO!!

••••HOW THE CHINESE CELEBRATE THE FALL🍁
••••SEASON🍁!!

••••HERE’S THE VIDEO!!
••••HERE’S THE VIDEO!!


••••HERE’S THE VIDEO!!
••••HERE’S THE VIDEO!!

••••HERE’S THE VIDEO!!

••••KATHY’S TOUR OF FOOD CONTINUES IN
••••IN CHINA 🇨🇳!!! PLEASE JOIN ME!!!

••••RECIPE BY MAGGIE ZHU🇨🇳!!
🧈🍳🍚🧈🍳🍚🧈🍳🍚🧈🍳🍚🧈🍳🍚🧈🍳🍚🧈🍳🍚🧈🍳🍚🧈🍳🍚🧈🍳🍚🧈🍳🍚🧈🍳🍚


 •••FOR EMERGENCIES ONLY!! OUR EMERGENCY#


